

The aroma of fresh bread holds a special place in my heart, reminding me of Sunday mornings at my grandma’s house. She had a way of making everything feel effortlessly delicious, even when it wasn’t particularly “easy.” For years, I chased that feeling, experimenting with countless recipes, especially for breakfast staples. Then, one crisp autumn morning, a friend casually mentioned a “two-ingredient bagel” idea.
My ears perked up. Could it be true? Could something so simple yield a genuinely satisfying bagel?
I confess, I was skeptical. However, curiosity, as they say, often leads to delicious discoveries. I rushed to my kitchen, combining plain Greek yogurt and self-rising flour.
What emerged from my oven a short while later were not just any bagels, but truly incredible Yogurt Bagels. They boasted a delightful chew, a tender interior, and a golden crust – all without the fuss of yeast, long rises, or boiling. These Yogurt Bagels quickly became a staple in my home, a testament to simple ingredients creating extraordinary results.
They proved that homemade goodness doesn’t require a whole day in the kitchen. Over the years, I’ve perfected this recipe, turning these easy Yogurt Bagels into a reliable favorite. Now, I’m thrilled to share my tried-and-true method for making the best Yogurt Bagels you’ll ever taste, right in your own kitchen. Get ready to fall in love with homemade baking!
Why You’ll Love These Easy Yogurt Bagels
Indeed, you are about to discover your new favorite breakfast hero: homemade Yogurt Bagels! I promise, these are not just any bagels; they are a revelation. First and foremost, the simplicity factor is unmatched.
Forget about fussy yeast, long proofing times, or the traditional boiling step that often intimidates home bakers. This recipe streamlines the entire process, making bagel-making accessible to everyone, even absolute beginners. You will be amazed at how quickly you can go from mixing bowl to a batch of warm, freshly baked Yogurt Bagels.
Moreover, these aren’t just convenient; they are incredibly delicious. Each Yogurt Bagel boasts a perfectly chewy exterior and a soft, fluffy interior, exactly what you desire from a classic bagel.
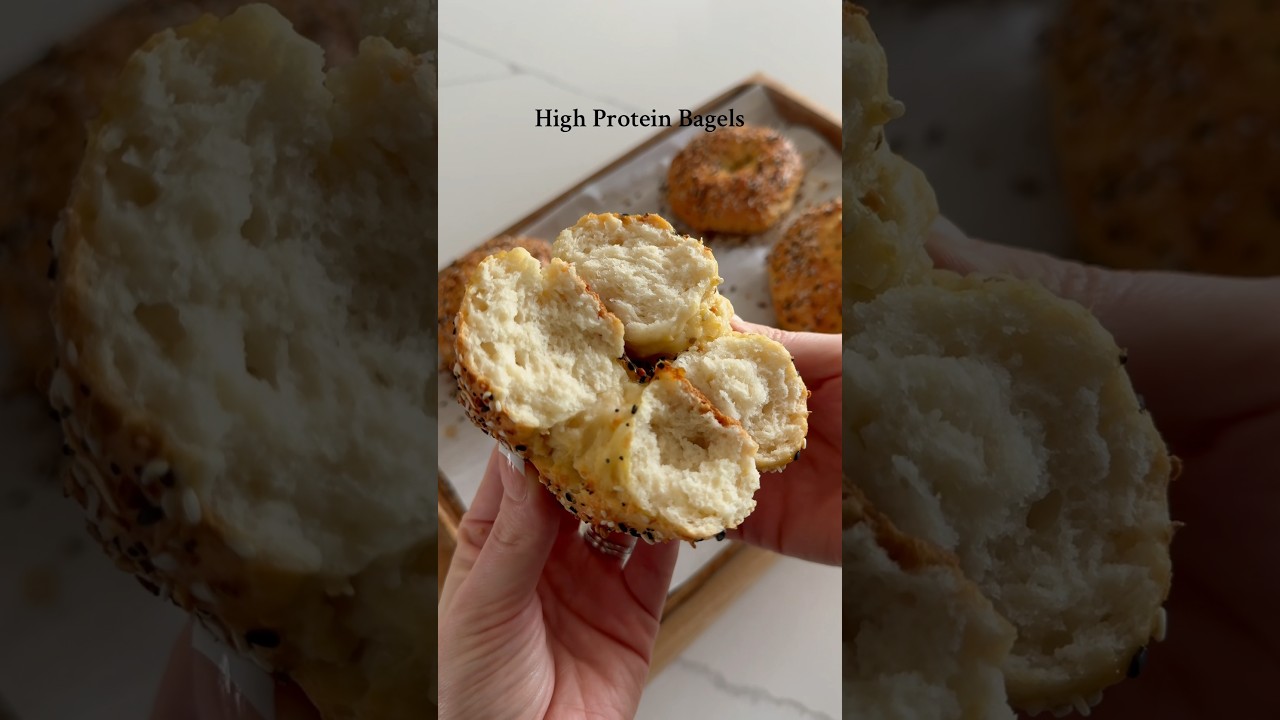
Furthermore, the nutritional profile of these Yogurt Bagels is a fantastic bonus. By using Greek yogurt as a primary ingredient, you automatically boost the protein content and reduce the fat found in many traditional bagel recipes. This means you can enjoy a satisfying breakfast that keeps you feeling fuller for longer.
It’s a win-win situation for both your taste buds and your well-being. Additionally, these homemade Greek Yogurt Bagels offer unparalleled freshness. There’s simply nothing quite like the smell and taste of a bagel pulled straight from your own oven.
You control every ingredient, ensuring a wholesome and delightful treat. Finally, the versatility of these Yogurt Bagels is incredible. You can customize them with endless toppings, mix-ins, and seasonings, tailoring them perfectly to your preferences.
Whether you crave a sweet cinnamon-raisin bagel or a savory everything bagel, this base recipe adapts beautifully. Prepare to be delighted by the ease, taste, and versatility of these incredible homemade Yogurt Bagels!
Ingredients You’ll Need
Crafting delightful Yogurt Bagels requires just a handful of common pantry staples. Quality ingredients are key, ensuring the best texture and flavor for your homemade bagels. Here’s exactly what you will need to gather for your batch of delicious Yogurt Bagels.

| Ingredient | Quantity | Notes |
|---|---|---|
| Self-Rising Flour | 2 cups | Essential for the rise; contains leavening agents. |
| Plain Greek Yogurt | 2 cups | Full-fat or 2% works best for texture; avoid non-fat if possible for richer results. |
| Egg (for wash) | 1 large | Whisked with a splash of water or milk for a golden crust. |
| Toppings (optional) | As desired | Everything Bagel seasoning, sesame seeds, poppy seeds, sea salt, cinnamon sugar. |
For the self-rising flour, it truly is the magic behind these easy Yogurt Bagels. It contains flour, baking powder, and salt already combined, eliminating the need to measure separate leavening agents. This simplifies the recipe significantly.
Regarding the Greek yogurt, opt for a good quality, plain variety. The thicker consistency of Greek yogurt is crucial for achieving the right dough texture. Full-fat or 2% yogurt yields a richer, more tender bagel.
While non-fat can work in a pinch, it might result in a slightly tougher texture. The egg wash is a small but mighty step; it gives your Yogurt Bagels that beautiful, glossy, golden-brown finish and helps toppings adhere perfectly. Lastly, choose your favorite toppings! This is where you can truly personalize your homemade Yogurt Bagels.
Substitutions & Variations
One of the great joys of making homemade Yogurt Bagels is their incredible adaptability. This recipe serves as a fantastic foundation, ready for you to customize and experiment with. Here are some of my favorite substitutions and variations to help you make these Yogurt Bagels uniquely your own.
Flour Alternatives: While self-rising flour is the cornerstone of this simple Yogurt Bagels recipe, you can certainly make a substitution. If you only have all-purpose flour on hand, combine 2 cups of all-purpose flour with 3 teaspoons of baking powder and ½ teaspoon of fine salt. This effectively creates your own self-rising flour mixture.
For a slightly healthier twist, you can try substituting up to half of the self-rising flour with whole wheat pastry flour. However, be aware that whole wheat flour absorbs more liquid, so you might need to add an extra tablespoon or two of yogurt to reach the desired dough consistency. I don’t recommend using 100% whole wheat flour, as it can make the Yogurt Bagels too dense.
Yogurt Choices: Plain Greek yogurt is my top recommendation for these Yogurt Bagels due to its thickness and tang. If you only have regular plain yogurt, you can still use it, but you might need to strain it first through a cheesecloth-lined sieve for an hour or two to remove excess liquid. This prevents your dough from becoming too sticky.
Avoid flavored yogurts, as their sugars and artificial flavors will negatively impact the bagel’s taste and texture. For a slight variation, some people enjoy using Icelandic skyr, which is even thicker than Greek yogurt, resulting in a very substantial bagel.
Flavor Enhancements (Sweet):
* Cinnamon Raisin: Mix 1/4 cup of raisins and 1 teaspoon of ground cinnamon into the dough after you’ve combined the flour and yogurt. Sprinkle with cinnamon sugar before baking. These sweet Yogurt Bagels are a real treat.
* Blueberry: Gently fold in 1/4 cup of fresh or frozen small blueberries (don’t overmix if using frozen) into the dough.
* Honey Wheat: Add 1 tablespoon of honey to the dough mixture for a subtle sweetness and use whole wheat pastry flour for a portion of your flour blend.
Flavor Enhancements (Savory):
* Everything Bagel: This is a classic for a reason! Before baking, generously sprinkle your Yogurt Bagels with everything bagel seasoning after applying the egg wash.
* Cheddar Jalapeño: Fold in 1/4 cup of shredded sharp cheddar cheese and 1-2 tablespoons of finely minced pickled jalapeños (drained well) into the dough.
* Garlic Herb: Add 1 teaspoon of garlic powder and 1 tablespoon of finely chopped fresh herbs like chives or parsley to the dough mixture. Sprinkle with more garlic powder and dried oregano before baking for aromatic Yogurt Bagels.
* Parmesan Black Pepper: Incorporate 2 tablespoons of grated Parmesan cheese and 1/2 teaspoon of freshly cracked black pepper into the dough. Top with more Parmesan before baking.
Remember, when adding mix-ins, ensure they are not too wet, as this can alter the dough consistency. For best results, gently fold them in at the end of the mixing process. These variations ensure your homemade Yogurt Bagels never get boring!
One of the great joys of making homemade Yogurt Bagels is their incredible adaptability. To enhance your creativity in the kitchen, check out this Raspberry Yogurt Panna Cotta for a delightful accompaniment.
Step-by-Step Instructions
Making these incredible Yogurt Bagels is a straightforward process, and with my detailed steps, you will achieve perfect results every time. Follow along closely, and soon you’ll be enjoying warm, chewy bagels right from your own oven.
Note: This video is for demonstration purposes and may use a slightly different method.
1. Preheat Your Oven & Prepare Baking Sheet: First, preheat your oven to 375°F (190°C). Then, line a large baking sheet with parchment paper or a silicone baking mat. This prevents sticking and ensures even baking for your Yogurt Bagels.
2. Combine Flour and Yogurt: In a large mixing bowl, combine the 2 cups of self-rising flour and 2 cups of plain Greek yogurt. Use a sturdy spoon or a rubber spatula to mix these two ingredients together. At first, it will look shaggy and crumbly.
3. Form the Dough: Continue mixing until a cohesive dough forms. It will be sticky initially.
Now, turn the dough out onto a lightly floured surface. Knead the dough gently for about 5-8 minutes. You aim for a smooth, elastic dough that is no longer overly sticky. Add a very small amount of flour, only as needed, to prevent sticking, but avoid adding too much, which can make your Yogurt Bagels tough.
4. Divide the Dough: Divide the dough into 6-8 equal portions. For consistent size, you can use a kitchen scale; each portion should be roughly 3-4 ounces.
5. Shape the Bagels: Roll each portion into a rope about 8-10 inches long. Pinch the ends together firmly to form a circle, creating the classic bagel shape with a hole in the center.
Ensure the seam is sealed well, otherwise, your Yogurt Bagels might unroll during baking. Alternatively, you can form a ball and then poke a hole through the center with your finger, stretching it gently to create an even ring.
6. Prepare Egg Wash & Add Toppings: In a small bowl, whisk the large egg with 1 tablespoon of water or milk. Brush each bagel generously with this egg wash. This wash helps achieve that beautiful golden-brown crust and ensures your toppings adhere.
7. Apply Toppings: If desired, sprinkle your chosen toppings (everything bagel seasoning, sesame seeds, poppy seeds, etc.) onto the wet surface of each bagel. Gently press them to secure. These toppings truly elevate the flavor of your homemade Yogurt Bagels.
8. Bake the Bagels: Carefully place the shaped and topped Yogurt Bagels on your prepared baking sheet. Bake for 20-25 minutes, or until the bagels are golden brown and cooked through. Baking times can vary slightly depending on your oven, so keep an eye on them.
9. Cool & Serve: Once baked, transfer the Yogurt Bagels to a wire rack to cool slightly. While they are tempting to eat immediately, letting them cool for a few minutes allows them to set properly. Enjoy your freshly baked Yogurt Bagels warm, perhaps with your favorite spread.
Pro Tips for Success
As Chef Zaki, I’ve learned a few tricks over two decades in the kitchen. Here are my professional tips to ensure your homemade Yogurt Bagels turn out absolutely perfect every single time. These insights will elevate your baking game and make your Yogurt Bagels truly exceptional.

* Don’t Overwork the Dough: While kneading is important for developing a smooth texture, excessive kneading can make your Yogurt Bagels tough. Knead just until the dough is smooth and elastic, approximately 5-8 minutes. The moment it stops being overly sticky and forms a cohesive ball, you’ve done enough. Trust your intuition here.
* Mind the Yogurt Consistency: The type of Greek yogurt you use truly matters. Thicker Greek yogurt (like full-fat or 2%) yields the best results. If your yogurt is on the thinner side, strain it through a cheesecloth or coffee filter for an hour or two to remove excess liquid.
This helps maintain the proper dough consistency for your Yogurt Bagels. Too much moisture will make the dough sticky and difficult to work with.
* Flour Your Surface Sparingly: When turning the dough out to knead, use only a minimal amount of flour on your work surface and hands. Adding too much flour can dry out the dough, resulting in dense, dry Yogurt Bagels. A little dust is all you need to prevent sticking.
* Even Bagel Shaping: For uniform baking and a professional appearance, strive for consistent sizing when dividing your dough portions. Using a kitchen scale is ideal. When forming the rings, make sure the hole is wide enough.
It will shrink during baking. If the hole is too small, your Yogurt Bagels might close up or bake unevenly. Aim for a hole about 1-1.5 inches in diameter.
* The Power of Egg Wash: Do not skip the egg wash! It’s not just for making toppings stick; it’s crucial for that beautiful, shiny, golden-brown crust that defines a good bagel. A well-brushed bagel simply looks and tastes better. Plus, it gives the Yogurt Bagels a slightly chewy exterior.
* Hot Oven is Key: Ensure your oven is fully preheated to 375°F (190°C) before placing the bagels inside. A hot oven helps the bagels rise quickly and develop a lovely texture. If the oven is not hot enough, the bagels might spread more and become denser.
* Cooling Time Matters: Resist the urge to slice into your Yogurt Bagels immediately after they come out of the oven. While tempting, letting them cool on a wire rack for at least 10-15 minutes allows the internal structure to set. This prevents a gummy texture and ensures a better overall eating experience. Patience is a virtue when baking.
Following these pro tips will transform your journey into making the best homemade Yogurt Bagels imaginable. Happy baking!
As Chef Zaki, I’ve learned a few tricks over two decades in the kitchen. To further elevate your baking prowess, why not try these Delightful Low-Calorie Lemon Yogurt Cheesecake Cups for a sweet finish?
Storage & Reheating Tips
Once you’ve baked a batch of glorious homemade Yogurt Bagels, you’ll want to ensure they stay fresh and delicious. Proper storage is key to enjoying them for days to come.
Storage:
* Room Temperature: Your freshly baked Yogurt Bagels are best enjoyed on the day they are made. However, you can store them at room temperature in an airtight container or a sealed plastic bag for up to 2-3 days. Make sure they are completely cool before storing to prevent condensation, which can make them soggy.
* Refrigerator: If you live in a particularly humid climate or want to extend their freshness slightly, you can store them in the refrigerator for up to 4-5 days. Again, an airtight container is essential to prevent them from drying out.
* Freezer (Highly Recommended): For long-term storage, freezing is your best bet!
These Yogurt Bagels freeze beautifully. Once completely cooled, slice them in half (this makes reheating easier) and place them in a freezer-safe bag or airtight container. They will keep well in the freezer for up to 3 months. This way, you always have a quick homemade bagel ready.
Reheating:
* From Room Temperature/Refrigerator: To refresh your Yogurt Bagels, slice them in half and toast them in a toaster, toaster oven, or under the broiler until golden and warmed through. This brings back their crispy exterior and soft interior.
* From Frozen: If frozen, you can toast them directly from the freezer!
Simply pop the sliced, frozen Yogurt Bagels into your toaster or toaster oven. They might take a bit longer to toast, typically 5-7 minutes, until they are thawed and beautifully golden. Alternatively, you can let them thaw at room temperature for an hour or so before toasting. Reheating in a conventional oven (350°F/175°C for 5-10 minutes) also works wonderfully for a whole bagel or a larger batch.
With these storage and reheating tips, you can enjoy your delicious homemade Yogurt Bagels whenever the craving strikes!
What to Serve With This Recipe
The beauty of homemade Yogurt Bagels lies not only in their ease and deliciousness but also in their incredible versatility. They provide a perfect canvas for both sweet and savory toppings, making them suitable for any meal of the day.
Classic Spreads:
* Cream Cheese: The quintessential bagel topping! Plain cream cheese is always a winner, but don’t stop there. Experiment with chive and onion cream cheese, strawberry cream cheese, or even a homemade veggie cream cheese spread.
* Butter: Simple, yet utterly satisfying, especially on a warm, freshly baked Yogurt Bagel.
* Jam or Jelly: A spoonful of your favorite fruit preserve, be it raspberry jam, apricot jelly, or orange marmalade, adds a burst of sweetness.
* Nut Butters: Peanut butter, almond butter, or cashew butter provides protein and a creamy texture. Pair with sliced banana or a drizzle of honey for extra goodness.
Savory Pairings:
* Smoked Salmon & Capers: Elevate your breakfast with a classic lox and cream cheese combo. Add thinly sliced red onion and a sprinkle of dill for a truly gourmet experience. This is a fantastic way to enjoy your Yogurt Bagels.
* Avocado Toast Style: Mash fresh avocado with a squeeze of lime juice, salt, and pepper. Spread it on your Yogurt Bagel and top with everything bagel seasoning, chili flakes, or a fried egg.
* Egg & Cheese: Create a delicious breakfast sandwich.
Scramble or fry an egg, add a slice of your favorite cheese (cheddar or provolone work well), and place it between your sliced Yogurt Bagel. Add bacon or sausage for a heartier meal.
* Hummus & Veggies: For a light lunch, spread hummus on your bagel and top with sliced cucumber, tomatoes, bell peppers, or sprouts.
A sprinkle of za’atar adds an authentic touch.
* Cream Cheese & Everything Bagel Seasoning: This combination is simple, flavorful, and incredibly popular. The homemade Yogurt Bagels provide the perfect base.
Sweet Treats:
* Cinnamon Sugar Butter: Mix softened butter with cinnamon and sugar for a delightful sweet spread.
* Ricotta & Honey: Spread fresh ricotta cheese, drizzle with honey, and sprinkle with a pinch of sea salt for a sophisticated sweet treat.
* Fruit & Yogurt: Top your Yogurt Bagel with a dollop of Greek yogurt (the same kind you used to make the bagels!), fresh berries, and a sprinkle of granola.
Indeed, these homemade Yogurt Bagels are incredibly versatile. They are perfect for a quick breakfast, a satisfying brunch, or even a light lunch. Enjoy experimenting with all the possibilities!
The beauty of homemade Yogurt Bagels lies not only in their ease and deliciousness but also in their incredible versatility. For a delicious savory option, consider pairing your bagels with this One-Pan Chicken with Bulgur, Tomatoes & Feta for a satisfying meal.
FAQs
You likely have some questions about these fantastic Yogurt Bagels. As your trusted kitchen guide, I’m here to provide clear, helpful answers.
Can I use plain yogurt instead of Greek yogurt for Yogurt Bagels?
While it’s possible, I strongly recommend sticking with plain Greek yogurt for these Yogurt Bagels. Greek yogurt has a much thicker consistency due to its straining process, which is crucial for achieving the correct dough texture.
Regular plain yogurt contains more liquid, which will result in a much stickier dough that is harder to handle and might require more flour, leading to a denser bagel. If regular plain yogurt is all you have, strain it first by placing it in a cheesecloth-lined sieve over a bowl for at least an hour (or longer) to remove excess whey.
Do I need to boil the Yogurt Bagels before baking?
Absolutely not! That’s one of the best parts about this recipe for Yogurt Bagels. Traditional bagels are boiled to create their signature chewy crust.
However, the unique combination of self-rising flour and Greek yogurt in this recipe magically achieves a wonderful chewy texture without the boiling step. It truly simplifies the process, making homemade bagels much more accessible.
How long do homemade Yogurt Bagels last?
These homemade Yogurt Bagels are best enjoyed fresh, ideally within 1-2 days at room temperature in an airtight container. They will last slightly longer, up to 4-5 days, if stored in the refrigerator. For longer storage, I highly recommend freezing them. They freeze beautifully for up to 3 months when stored in a freezer-safe bag or container, making them perfect for meal prep.
Can I make Yogurt Bagels gluten-free?
Yes, you can adapt this recipe for gluten-free Yogurt Bagels, but with a crucial caveat. You will need to use a 1:1 gluten-free self-rising flour blend. Simply replacing regular self-rising flour with a standard gluten-free all-purpose flour (without added leavening) will not work.
Ensure your gluten-free flour blend specifically states “self-rising” or is suitable for a 1:1 substitution and includes xanthan gum for structure. The dough might be a bit stickier and less elastic, but you can still achieve delicious gluten-free Yogurt Bagels.
What’s the best flour for Yogurt Bagels?
Without a doubt, self-rising flour is the best and easiest choice for these Yogurt Bagels. It contains the perfect blend of flour, baking powder, and salt, which provides the necessary lift and flavor without any extra measuring or fuss. If you don’t have self-rising flour, you can create your own by combining 2 cups of all-purpose flour with 3 teaspoons of baking powder and ½ teaspoon of fine salt.
Yogurt bagels are a simple twist on traditional bagel-making that use yogurt and self-rising flour as the primary ingredients. This innovative method streamlines the process and creates a chewy, delicious bagel without the need for yeast or lengthy preparation; you can learn more about bagels in general by visiting this detailed article.
Nutrition Information (per serving)
Here is an estimated nutritional breakdown for one homemade Yogurt Bagel, calculated based on 8 servings per recipe and standard ingredient values. Please note that exact figures can vary depending on specific brands and portion sizes.
| Nutrient | Amount (approx.) |
|---|---|
| Calories | 200-220 kcal |
| Protein | 10-12 g |
| Fat | 2-3 g |
| Saturated Fat | 1-2 g |
| Carbohydrates | 35-40 g |
| Fiber | 1-2 g |
| Sugar | 3-4 g |
| Sodium | 250-300 mg |
Yogurt Bagels

These easy homemade Yogurt Bagels are a delightful twist on a classic breakfast staple, combining the simplicity of plain Greek yogurt and self-rising flour to create a chewy, tender bagel without the fuss of traditional methods. Perfectly customizable with various toppings and flavors.
- Prep Time: 20 mins
- Cook Time: 25 mins
- Total Time: 45 mins
- Yield: 6-8 servings
- Category: Breakfast
- Method: Baking
- Cuisine: American
- Diet: Gluten Free (with modifications)
Ingredients
2 cups Self-Rising Flour
2 cups Plain Greek Yogurt
1 large Egg (for wash)
Toppings (optional) as desired
Instructions
- Preheat your oven to 375°F (190°C) and line a baking sheet with parchment paper
- In a large bowl, combine the self-rising flour and Greek yogurt until a shaggy dough forms
- Knead the dough gently on a floured surface for 5-8 minutes until it is smooth and elastic
- Divide the dough into 6-8 equal portions and shape each into a bagel
- Prepare an egg wash by whisking the egg with water or milk and brush each bagel with it
- Add any desired toppings and bake for 20-25 minutes until golden brow
Notes
For best results, use full-fat or 2% Greek yogurt.
Allow bagels to cool on a wire rack for 10-15 minutes before serving.